Moodle without an LRS (NOTE: This only works with Storyline 1, I am trying to work out the bugs for 2)
Yes, we are tracking down data for the iPad like Duran Duran’s “Hungry Like the Wolf”. Have you always wanted to track your data via the iPad on Moodle but don’t have time or money to set up an LRS? Well, now you can with a plugin from Jamie Smith @ https://github.com/jgsmitty. I modified the code for Moodle 2.6.5 from Jamie’s code. I just changed the versioning numbers so that you can download it from here with no issues for 2.6.5. Here are the links
http://nixinteractive.com/plugins/tcapi.zip
http://nixinteractive.com/plugins/TCAPI-Moodle-SCORM-mod-master.zip
Once you change the SCORM to link above, Internet Explore 11 will not work with this. If someone out there has a way to make it work with this code it would be greatly appreciated.
Here is the original file that can be found here:
https://github.com/jgsmitty/TCAPI-Moodle-SCORM-mod
Our first step is make sure we have a backup of LMS or use a test area on your server to try this. To start with you will need to download the 2 files that I have above and unzip them to your computer. Now we need to open your FTP to your public directory that houses your Moodle files. Look for a folder called “local”, and upload the “TCAPI” file in there.
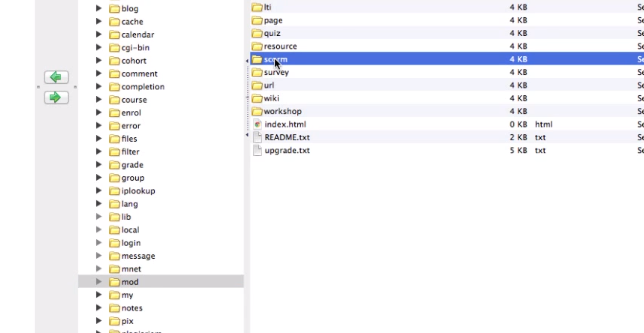
Next we need to go to our “mod” folder in the public or web folder, then find the “scorm” folder.
This is where it may be scary. As long as you have a backup, no worries. Here you will delete the contents of your “scorm” folder.
After we have deleted the “scorm” folder we need to replace it with the contents of the “TCAPI-Moodle-SCORM-mod-master” folder.
Now copy all of the folder’s contents into the scorm folder.
Now you will need to login to Moodle or click “notification” if you are already logged in to Moodle. Once you do you will see an upgrade screen, just click “Update database now”.
Then just click “Continue” after you get your success display.
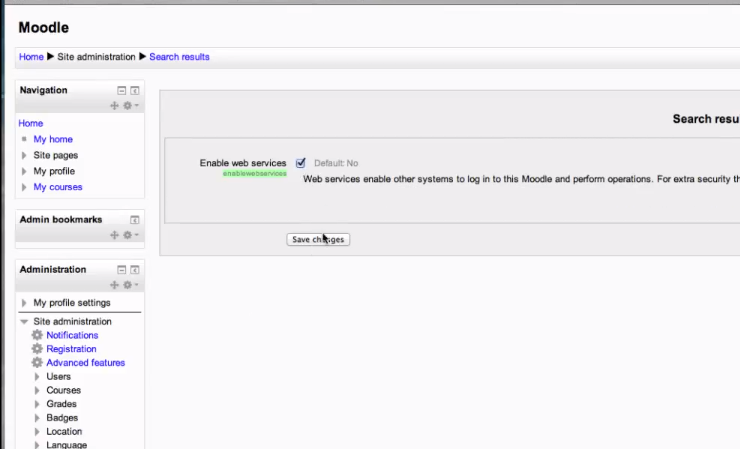
Now that that is done you will need to turn on “Web Services”, so in the search bar under “Administration” type in “services”.
Once you have searched “Services” you will need to scroll down after the search and enable “web services”.
Now a new page will open and tick “Enabled web services”.
Now we will need to go back to services and you will need to select “Enable Protocols”.
This will open a new page. Now select the eye on the “Rest protocol”
Once you have completed these steps upload a Tin Can course that you have completed from Storyline, and upload to a courses page using SCORM package activity. Once you have done this test out your course. If the course shows up then your are good to go. If you get an error try to run through the steps again. Make sure to assign a student to the course before you try your TIN CAN course or the LMS will not show that they have completed the course.
If you have any problems please comment below.
Thanks,
Chad
Spread the word. Share this post!


2 comments on “Tracking iPad Data to Moodle without an LRS”